How to Add Products to Cartanza

Once you’ve signed up for a free trial on Cartanza, the next thing you’ll likely want to do is to start adding your products to the admin site. You’ll want to have several things ready before you start to do this. This includes pictures of your products, all the pricing details, amount of inventory, and product descriptions. If you have all of this ready, configuring your products will be a lot easier. If you already have your products in Shopify, then you can export your products directly from them making the whole process a lot easier. We’ll cover both here so that you can use either option that applies to your situation. If you’re importing your products after exporting from Shopify, then skip to the end of the article.
Step 1: Login to Your Shop Admin Site
The url for your shop’s Cartanza admin site should be the same as your permanent domain, with the following text “/ghost” appended to it. So lets say your shop name is “shoes”, then your permanent domain would be https://shoes.cartanza.io and your permanent admin site location would then be https://shoes.cartanza.io/ghost .
Once you login to the Cartanza admin site, you’ll see the following welcome screen:
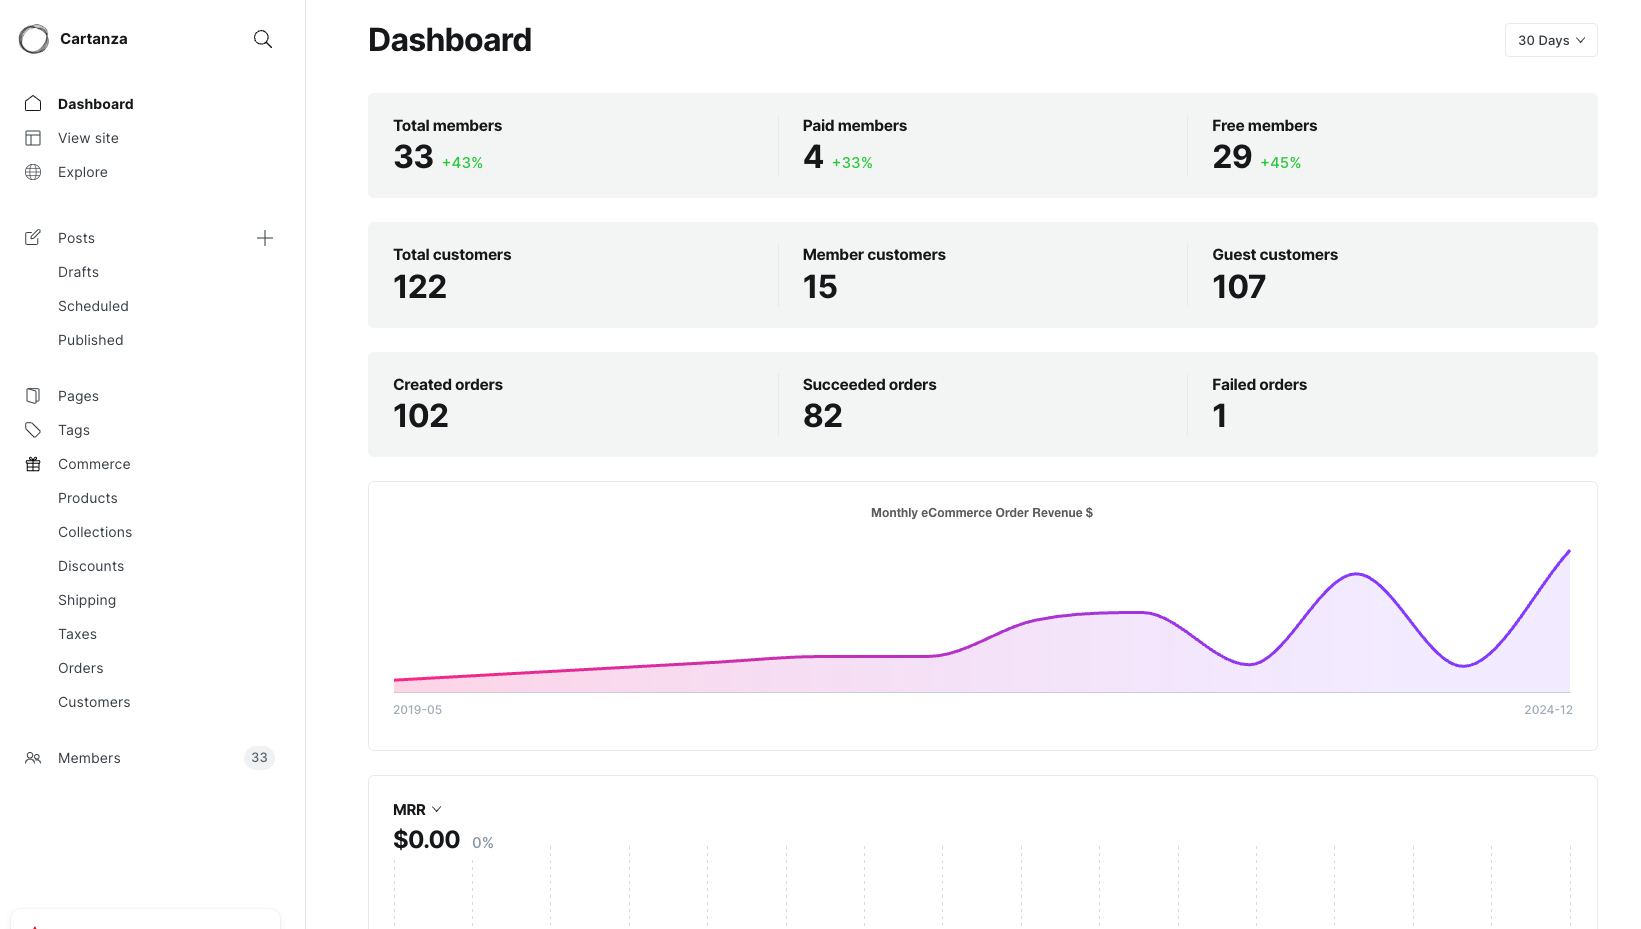
In the left menu, you'll see a "Commerce" main menu. Expand that to reveal all of the commerce sub-menus.
Step 2: Add a product
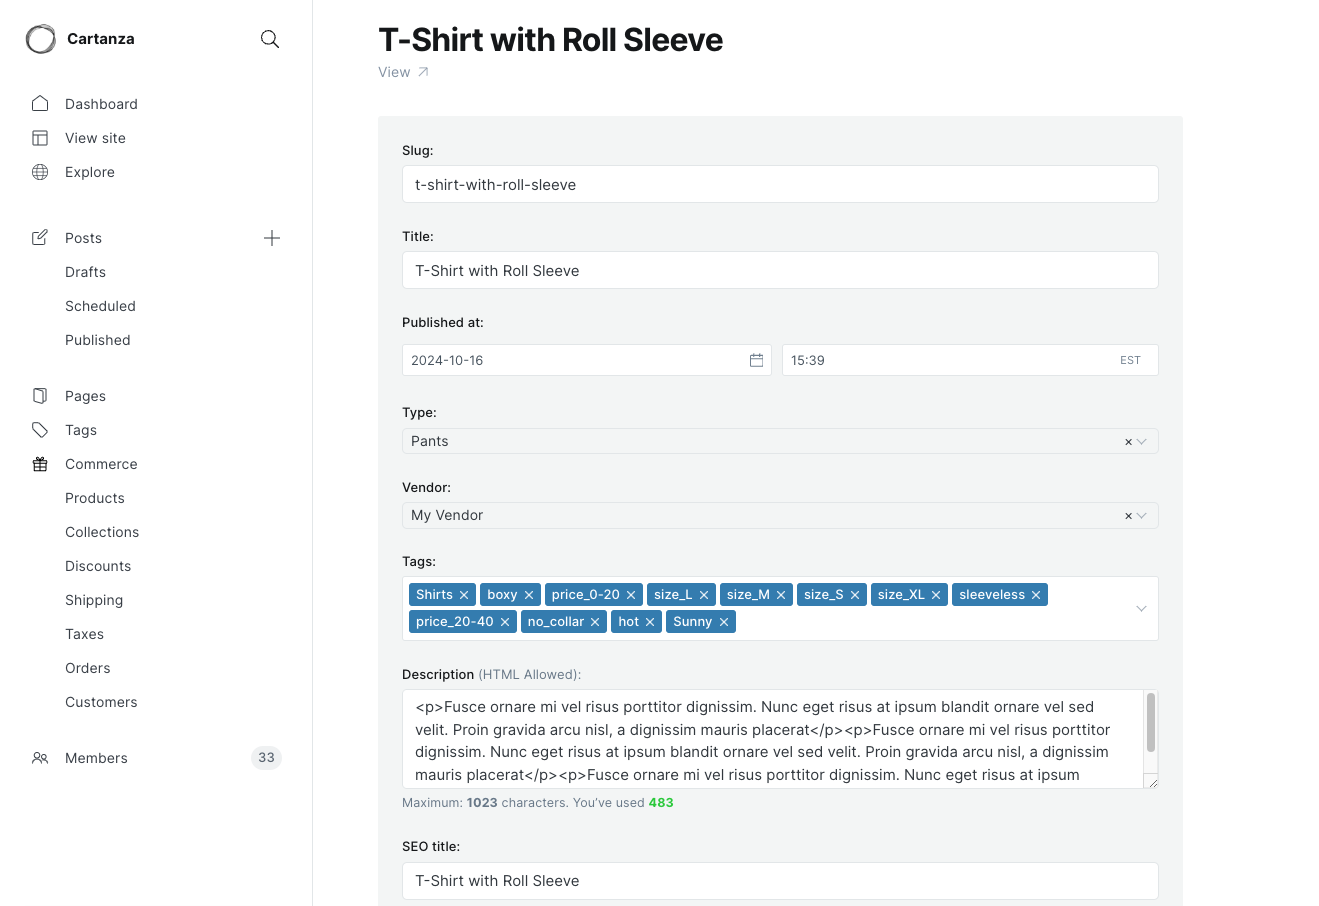
On the products page, click the blue “New product” button to add a product. Add the product title, SEO page title, and product description. Avoid any special or reserved characters in these fields. Next add the product content. Think of this as a detailed product description that will be seen and searchable by your customers.
Once you’ve added all your text, select the product type from the product types dropdown in the rate pane. If you don’t have any product types, now’s a great time to add them. For example you might have a product type for “Shirts”, or “Pants”. Next select the product vendor for this product. For example “Michael Kors” or “Nike” for the vendor. Again if you haven’t added these yet, then do so now in the vendors dropdown.
Also enter any tags you’ll like to use for your product. For example you may want to use “Denim” as a tag, or fall or spring as a tag. Tag has the same meaning as on other social media platforms. Basically it’s another way to categorize or group things together that are not already grouped by collection, type or vendor. You may want to use one of your options like the color yellow, for all products that are yellow. Or XL for all products that are extra large to quickly filter all of your products by that tag.
Here’s what this could look like at this point:
Step 3: Upload Your Product Images
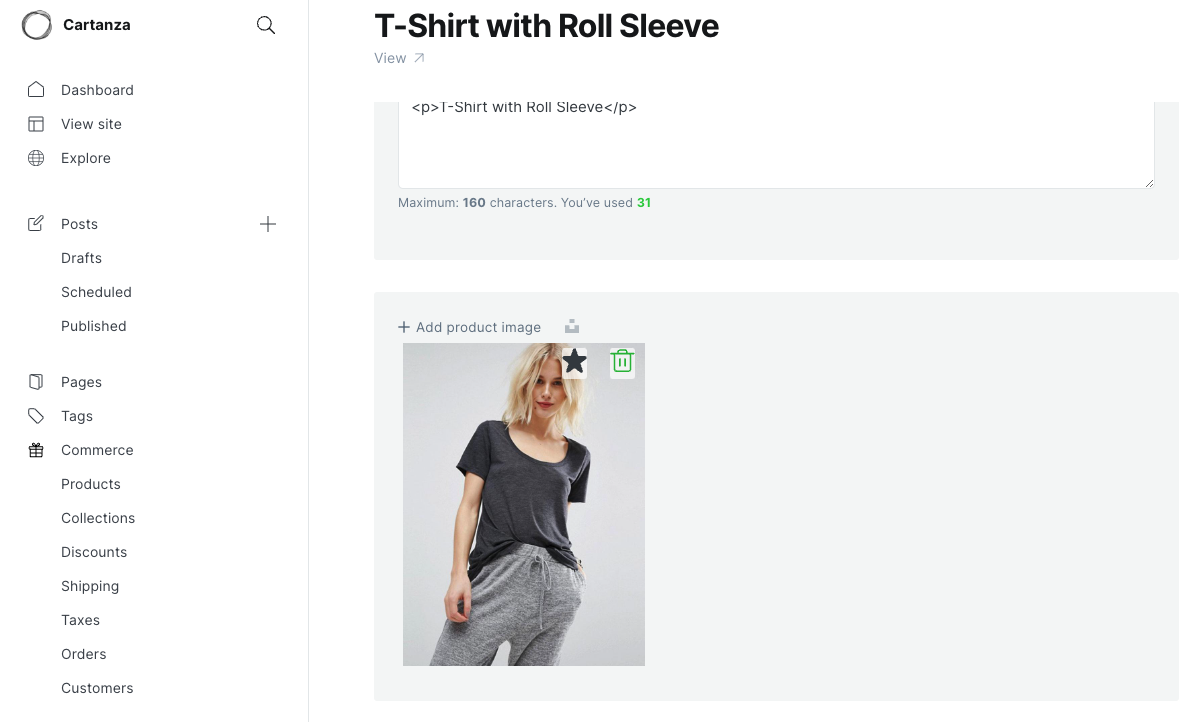
Whether you're reusing your vendor's images or have taken your own pictures, we can upload them to Cartanza during this step. On the product images pane, you can either click the “Upload image” link, or simply drag all your images to the cloud icon, with the up arrow shown over it. The first image you should upload is your featured product image. It’s best to select a lifestyle image for this one which shows your product in use by a potential customer. For a jacket you could show a person wearing the jacket in a park while walking their dog, or some other action shot. The other images should reveal features or attributes you want to convey about your product.
Step 4: Enter Your Pricing
If your product has only one variant, it’s time to enter the pricing for this single variant. You’re probably wondering, what exactly is a product variant any way? Let’s say you’re selling a T-Shirt for example. Let’s say this T-shirt only comes in black and is a one-size fits all product. That means you have only one variant of this product. If instead this product comes in three different sizes: small, medium and large, then you have three total variants. What if the T-shirt is also available in white as well? Well then you have two colors and three sizes, which is a total of six variants. If your product has more than one variant, then you need to check the following checkbox:
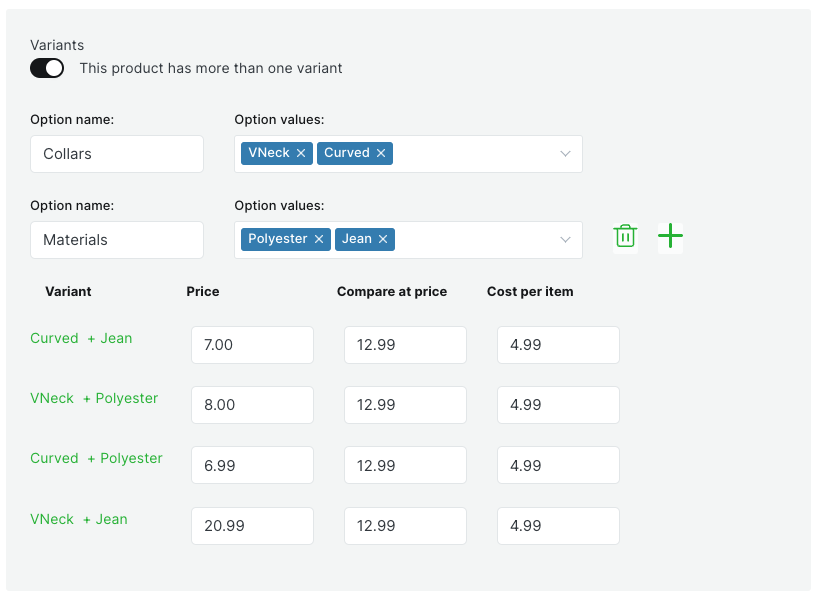
Once you do that, then you’ll be able to add the “Size” option and the three corresponding sizes “small”, “medium”, and “large”. Then add another option for “Color”, with the two colors “black” and “white”. Let's say for the sake of simplicity, this product has only one variant. Let's enter the price you want the customer to pay in the first “Price” field. For the purpose of this example, you want to sell your product for $10. Next, let’s say you know that there are other stores online that sell this for a lot more say $15, then you can enter this price in the “Compare at price” field. Your supplier for this product can supply this product to your for $7 including all shipping costs. Enter this price in the “Cost per item” field. This is your cost of the product. The difference between the cost per item and the price field is your margin on each product.
Step 5: Configure the Product Inventory
The last step is to enter all of the data related to inventory management. Currently the options are “Let Cartanza track inventory” or “Manual”. For this product we’ll select “Let Cartanza track inventory” as we have a limited supply of this product and we want to show out of stock when there aren’t any left. Enter the quantity of products for this variant here. If you know you have a product SKU and or Bar Code, then enter those values as well. Some products have a SKU which is standard for Stock Keeping Unit number. We recommend you enter it here if you have one. Many brick and mortar stores already have and follow this standard.

Step 6: Fulfillment Service
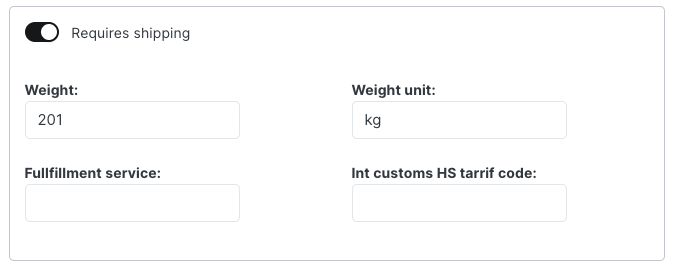
The only fulfilment option available right now is manual. This means you’ll need to arrange for shipping your product to your customer yourself. This is regardless of whether or not you use a drop shipping service. Enter the product weight in grams in the “Weight” field.
Step 7: Save and Preview
The last step is to save your product, and then click the “View product” link at the top of the page to view the product with the store theme you have selected. If you haven’t selected a theme yet, then skip this step as this option won’t work for you yet until you do. That’s all there is to it. You’ve created and configured your first product. Repeat these steps for all your products.
Optional: Import Your Shopify Products
If you already have a Shopify store, and you want to import them into Cartanza, then use the following steps to quickly do that.
Step 1: Export Your Products from Shopify
In your Shopify admin site, go to the product collections page where you see all of your products listed. On the left hand side of the screen you should see an “Export” button. Click this button and you should see a file ending in CSV which stands for Comma Saved Value file. This will have all of your products that you can use in the next step.
Step 2: Import Your Products to Cartanza
From the left menu, select products, then select catalogue where you’ll see your list of existing products if any. Then click the import button and select the CSV file you generated in the last step. Depending on the number of products, this could take a few seconds to a minute or so. Cartanza will also try and import all the images if available from the current Shopify site if it’s still live and available.